NEWS & ARTICLES

ปัญหาคาใจ “ทำ ไม๊...ตู้อาบน้ำสกปรก ง๊าย ง่าย”

November 20, 2020

ปัญหาคาใจ “ทำ ไม๊...ตู้อาบน้ำสกปรก ง๊าย ง่าย”
“เอชจี มีครบ”จบปัญหาคาใจ“ทำไม๊...ตู้อาบน้ำสกปรกง๊ายง่าย” 1. “คราบน้ำ -คราบสบู่” ที่เกาะแน่นติดกระจกและวัสดุต่างๆ 2. “คราบราดา” ที่เกิดขึ้นช้า ๆ ตามรองยาแนวและแนวซิลิโคน 3. ยังขัดล้างไปไมทันไร...ก็กลับเข้าวังวนนี้ใหม่ทั้งในข้อ 1 และข้อ 2
ซึ่งนั้นหาใช่เรื่องทีดูผิดแปลกแต่อย่างใด เพราะ...“หากการดูแลผิวพรรณที่ดี...มิได้จบลงเพียงแค่การ ฟอกสบู่ อยู่เช่นใด...ในเรื่องของ “ตู้อาบ
น้ำ” ก็ยังคงเป็นเช่นนั้น! ”  1. “คราบนํ้า -คราบสบู่”  สู่การขจัดคราบในระดับรูพรุนแม้จะเป็นที่รู้กันอยู่ว่าเจ้าคราบต่าง ๆ อันเกิดขึ้นได้จากทั้งการตกค้างการสะสมและการหมักหมมอยู่เป็นเวลานาน(บ้างทิ้งไว้เป็นสัปดาห์ บ้างก็ว่าเกือบแรมเดือน) จนมันระเหยแหงติดกับพื้นผิวของวัสดุอยู่ซ้ำ ๆ ยอมส่งผลให้สารประกอบทางเคมีที่ไม่ชอบน้ำบางชนิด เข้าไปติดลึกสะสมได้ถึงในระดับรูพรุน (porous) ซึ่งเป็นสาเหตุหลักที่ทำให้การทำความสะอาดแบบที่เรียกว่า Deepcleaning นั้นอาจต้องถูกทำกันแบบซ้ำ ๆ วนอยูอยางนั้นหลายๆรอบ จึงจะสามารถลอกออก หรือขจัดคราบสกปรกเหล่านั้นได้อย่างหมดจด (สามารถสังเกตุเห็นได้จากคราบสบู่จนขึ้นฝ้าตามกระจกอาบนํ้าหรือแม้กระทั่งจากคราบขาวหินปูนที่บริเวณของหัวก๊อกนํ้านั่นเอง)       ดังนั้นการขจัดคราบต่าง ๆ ตามลักษณะที่ปรากฏ ตั้งแต่คราบท่ียังดูอ่อน ๆ จนกระทั่งคราบมีการติดสะสมฝังแน่นด้วยการเลือกใช้ผลิตภัณฑ์ที่สามารถปรับระดับความเข้มข้น (ผสมกับนํ้าเปล่า)อย่าง“เอชจีบลู” นั้นนอกจากจะช่วยให้คุณสามารถทำความสะอาดคราบต่าง ๆ ได้อย่างหมดจดแบบตรงจุดได้แล้วยังมีคุณสมบัติในการไม่ไปทำลายร่องยาแนวและซิลิโคนอีกด้วย (ซึ้งนํ้ายาทั่วไปอาจมีความรุนแรงจนไปทำลายในจุดนี้ได้) ส่วนบ้านใดที่มีการทำความสะอาด และดูแลสุขอนามัยภายในห้องนํ้าอย่างเป็นประจำอยู่แล้วการใช้งานร่วมกับ “เอชจี สเกล อะเวย์ ” ก็นับว่าตอบโจทย์ได้เป็นอย่างดีเลยทีเดียว เพราะด้วยคุณสมบัติเฉพาะแบบโฟมสเปรย์นี่เอง ซึ่งนอกจากการใช้งานที่สะดวกแล้วยังเหมาะเป็นอย่างยิ่งกับพื้นที่ในแนวตั้ง (ตัวผนังหรือตู้อาบนํ้า ) ทั้ง ยังเป็นเหตุผลสำคัญของการช่วยลดคราบหนักสะสมท่ีอาจเกิดข้ึนได้เป็นอย่างดีอีกด้วยและนับได้ว่าทั้ง 2 ตัวนี้ สามารถจัดเปนชุดพื้นฐานให้กับการทำความสะอาดคราบนํ้า คราบสบู่หรือคราบหินปูนต่าง ๆ ภายในห้องนํ้า โดยเฉพาะกับตู้อาบนํ้าและสุขภัณฑ์ต่าง ๆ ได้ตั้งแต่ในระดับของคราบที่ขจัดออกได้ยากนั่นเอง “เอชจี บลู”      + มีความเข้มข้นสูง (ผสมน้ำในอัตตราส่วน 1 ต่อ 10 )      + หากเจอคราบหนัก สามารถเพิ่มระดับความเข้มข้นได้ตามลักษณะของคราบที่ปรากฏ      + ใช้ได้กับทั้งคราบ คราบน้ำ คราบหินปูน คราบเหลืองสุขภัณฑ์      + ไม่ทำลายร่องยาแนวและซิลิโคนของตูอ้าบน้ำ “เอชจี สเกล อะเวย์” + ด้วยขวดแบบสเปรย์ทำให้สะดวกต่อการใช้งานและทำความสะอาดอยู่เป็นประจำ       + ด้วยคุณสมบัติของโฟมสเปรย์ จึงเหมาะกับพื้นท่ีในแนวตั้งอย่างแนวผนังหรือตู้อาบน้ำ + ช่วยลดการสะสมของคราบหนักได้เป็นอย่างดี       + ไม่ทำลายร่องยาแนวและซิลิโคนของตูอ้าบน้ำ 2. “คราบราดำ” ภัยเงียบสุดสำคัญที่มักสะสมอยู่ตามร่องยาแนวและแนวซิลิโคน       จากข้อมูลทางการศึกษาเคยมีการตรวจพบว่า มีเจ้า "เชื้อราดำ" จำนวนรวมกว่า 40 สายพันธุ์บนโลกซึ่งนอกจากจะสามารถเจริญเติบโตได้เป็นอย่างดี ทั้งตามผนังห้องน้ำ ร่องยาแนว หรือตามห้องครัวแล้วยังพบว่าะวกมันมีการแพร่กระจายของสปอร์ หรือเป็นที่รู้จักกันในชื่อ "Toxic Black Mould" อันนับเป็นหนึ่งในสาเหตุของโรคทางเดินหายใจ ภูมิแพ้ และอาจนำไปสู่การเสียชีวิตในบางกรณีได้เลยทีเดียว       จึงทำให้ในวงการขจัดคราบราดำในกลุ่มดังกล่าว โดยเฉพาะในฝั่งของทางยุโรปที่พบเจอเชื้อราในกลุ่มนี้อยู่เป็นประจำนั้น เลือกใช้ผลิตภัณฑ์ที่มีส่วนผสมของสารในกลุ่ม Chlorine bleach หรือ"เอชจี โมลด์ สเปรย์" ซึ่งมีฤทธิ์ในการ "ฆ่า" (destoy) กลุ่มเชื้อราดังกล่าวได้ถึงในระดับของสปอร์ย่อมเป็นทางเลือกที่ดีกว่าการใช้เพียงน้ำส้มสายชู หรือ เบคกิ้งโซดา เพราะจากการทดสอบของสารทั้งสองชนิดนี้กลับมีคุณสมบัติเพียงแค่การ "ยับยั้ง" (Inhibits) การแพร่กระจายของเจ้าเชื้อราดำเท่านั้นเอง 3. ยังขัดล้างไปไม่ทันไร...ก็กลับเข้าวังวลนี้ใหม่อีกแล้วหรอเนี๊ยยย!!!       หากเปรียบความหมองคล้ำ-คราบไคล เป็นดั่งคราบน้ำ-คราบสบู่ หรือการเกิดสิว ขึ้นฝ้าคล้ายดั่ง คราบหินปูนสะสม ซึ่งล้วนเป็นสาเหตุที่เกิดจากสิ่งสกปรกต่าง ๆ สะสม จนอาจเกิดการอุดตันฝังแน่นอยู่ในรูขุมขน (รูพรุน) ที่ยากจะดูแลได้       "หากการดูแลผิวพรรณที่ดี...มิได้จบลงเพียงแค่การฟอกสบู่ อยู่เช่นใด...ในเรื่องของ"ตู้อาบน้ำ"ก็คงเป็นเช่นนั้น!" จึงนับเป็นประโยคโปรยจากข้างต้น และดูตรงกับการนำไปสู่คำตอบสุดท้ายของในส่วนนี้ได้เป็นอย่างดี นั่นคือ การทาด้วยครีมโลชั่น หรือ "การเคลือบผิวให้กับวัสดุ"       เพราะไม่ว่าจะเกิดขึ้นจากการตกหล่น หรือการละเลยในขั้นตอนนี้ไปมากน้อยเพียงใดก็ย่อมส่งผลต่อพื้นผิวของวัสดุนั้น ๆ ให้กลับมาเป็นแหล่งสะสมของคราบต่างๆ ได้อย่างง่ายดาย โดยเฉพาะในบริเวณของตู้อาบน้ำ ผนังฉากกั้น หรือร่องยาแนวต่างๆ       ดังนั้น การปกป้องผิวพรรณให้กับตู้อาบน้ำและวัสดุต่าง ๆ เพื่อไม่ให้กลับไปเกิดปัญหาของคราบสะสมหนักและการทำความสะอาดแบบธรรมดาที่ต้องใช้เวลานานนั้น ก็คือ การเคลือบผิวด้วยผลิตภัณฑ์สูตรพิเศษที่เป็นShower protector โดยเฉพาะอย่าง "เอชจี ชาวเวอร์ ชีลด์" สำหรับตู้อาบน้ำและผิววัสดุต่าง ๆ หรือ"เอชจี เคลือบยาแนว" ที่สามารถซึมลึกได้ถึงในระดับรูพรุน โดยทั้งสองมีคุณสมบัติในการป้องกันการยึดเกาะของสารประกอบที่มักจะตกค้าง รวมทั้งความเป็นเบสจากทั้งคราบน้ำหรือคราบสบู่ได้อย่างมีประสิทธิภาพ       ซึ่งนอกจากจะช่วยให้การทำความสะอาดสามารถทำได้อย่างมีประสิทธิภาพให้พื้นผิวของวัสดุ สามารถสังเกตุเห็นได้ถึงความสะอาดใส หรือมีความแวววาวมากยิ่งขึ้น เมื่อลองมองผ่านกระจกอันเป็นฉากกั้น หรือหัวก๊อกน้ำที่กำลังล้อกับแสงไฟวิบๆวับๆ อยู่ในทุกครั้งที่ต้องเข้าห้องน้ำนั่นเอง
Concrete dust removal | Best tips for how to remove cement dust

October 02, 2020

Concrete dust removal | Best tips for how to remove cement dust
Removing cement dust from, for example, ceramic or cement tiles can be a difficult task. Cement dust is created when you apply grout to floor or wall tiles, because a thin layer always remains. This leaves a dull layer on the new floor or wall. We have a few tips for concrete dust removal and effective ways to prevent it. * What is the best way to remove cement dust? * Three good ways for cleaning concrete dust * HG is thé cement dust removal solution * What is the best way to remove cement dust? It is important to clean cement dust off of tiles as quickly as possible, because the longer you leave it, the more difficult concrete dust removal becomes.

Clean up concrete dust immediately using lukewarm water and a small sponge. 
 Three good ways for cleaning concrete dust You can find quite a few tips for concrete dust removal on various forums that you might want to try. 1. Tea towel
When the cement dust is still quite fresh you can try cleaning the concrete dust with a tea towel. Rub the surface of the tiles quite hard with a dry tea towel. This may remove the cement dust, but it is rather hard work and also takes quite a long time. 2. Scrapers
You can also try scraping tools. You must be very careful not to damage the tiles if you choose this method of concrete dust removal. 3. Vinegar mixture
Mix equal parts of vinegar and water (50/50). This acidic mixture works well for cleaning concrete dust. This mixture can damage your tiles, so we recommend that you test it on a surplus tile first. Also be cautious with acids on marble and other calciferous natural stone. Consult an expert for advice if necessary. Do you prefer a safer, easier and less time-consuming concrete dust removal method? Then try one of the HG solutions developed especially for concrete dust removal.
 HG is thé cement dust removal solution HG has various products in the assortment for safe cement dust removal from many different surfaces. Is the cement dust on marble or other calciferous natural stone, concrete or epoxy tiles containing natural stone, such as granite or marble composite? Then use HG natural stone cement & lime film remover (HG product 31).

We also have HG cement grout film remover (HG product 11) in our assortment for removing cement dust from all types of porous and non-porous ceramic tiles and flagstones. It is also suitable for cleaning concrete dust on non-calciferous natural-stone types, such as Norwegian slate, granite and quartzite. The unique aspect of this product is that it dissolves cement from the tile surface but not the cement from the grouting. The grout is even strengthened.

Is it stubborn cement and mortar dust on porous and non-porous tiles? Then we advise HG cement, mortar & efflorescence remover (HG product 12). It is also suitable for non-calciferous natural stone.
The best tips to learn how to unblock a sink

September 16, 2020

The best tips to learn how to unblock a sink
Blocked sink? The best tips to learn how to unblock a sink kitchen Learning how to unblock a sink is not difficult, but can come in quite handy. Food remains are often the biggest cause of a blocked sink, especially with kitchen sinks. You can prevent a blocked sink by first wiping off dirty dishes with a paper towel before rinsing them off in the sink. In addition to this advice, we will share a few other tips on this page to help prevent these types of problems as well as the best ways to unblock a blocked sink. * 4 tips for preventing a blocked sink * How to unblock a sink * HG is the solution for a blocked sink * Causes of a blocked sink 4 tips for preventing a blocked sink A sink can easily get blocked with daily use. The tips below will help you prevent a blocked (kitchen) sink. 1. Do not leave food remains in the kitchen sink
 Wipe off dirty dishes with a paper towel above the bin and remove most of the remaining food. Then wash the plates in the sink with water and a washing up brush or in the dishwasher. And maybe put an extra filter above the sink to prevent food remains from getting into the drain. 2. Pour hot water down the drain regularly
 This rinses the sink and the hot water carries away the grime. And this does not damage the drain in any way. 3. Use soda regularly to rinse the drain
 Soda is stronger than water so it removes more grime. 4. Never throw frying oil or gravy in the sink 
It does sound like an easy solution to just throw the oil you used for frying in the sink. But frying oil, just like gravy, coagulates when it cools. It then forms clumps that also block other food remains, etc. causing even more build up.
 How to unblock a sink Various websites and blogs have household tips for blocked sinks. Below are 2 of these household remedies. You can try the following alternatives to unblock your blocked sink. 1. Coffee grounds
 You can try unblocking a blocked sink by pouring coffee grounds from a used coffee filter or espresso machine down the sink. Coffee grounds should work as an abrasive and clean the drain. 2. Baking soda and vinegar
 You could also try a combination of baking soda and vinegar. Put some baking soda in the sink and add a bit of vinegar. Then rinse the drain with hot water. Still not getting the desired effect? Then why not try the HG solutions developed especially for everyone who wants to know how to unblock a sink.
 HG is the solution for a blocked sink HG developed HG kitchen unblocker for blocked kitchen sinks. This unblocker was developed especially for unblocking a blocked kitchen sink. A blocked sink is often caused by rinsing away food remains, grease and oil. HG kitchen sink unblocker works on the basis of natural micro-organisms which, so to speak, eat through the blockage and can therefore always deal effectively with any kind of blockage. The natural enzymes and micro-organisms mean it is completely biodegradable and absolutely safe for all types of drains and septic tanks. For extremely stubborn blocks, we recommend HG duo unblocker. To unblock a blocked drain, toilet or shower drain, we advise HG liquid drain unblocker.
 Causes of a blocked sink A blocked sink can occur often, but what exactly causes a blocked sink? As we said, food remains and grease are the main causes of a blocked sink. These food and grease remains cause build up that eventually lead to a blocked sink. In addition, soap remains either create or make the blocked sink worse. These soap remains build up, making the drain narrower and narrower with time. When enough residue has built up to completely block the kitchen sink, you need to know how to unblock a sink. A sink or other drain can also become blocked due to improper installation or old drainage pipes. In many older homes, drainage pipes are often made of cast iron. These drains become blocked with rust in combination with other dirt, grime and waste. If this sounds familiar, then we recommend that you have them thoroughly cleaned by a professional unblocking company or plumber.
How to remove sticker residue

September 16, 2020

How to remove sticker residue
How to remove sticker residue: the best tips for removing stickers Stickers can be stuck on so tight that it simply isn't possible to remove them. You end up pulling off part and you're left with those ugly sticker and glue residues that only become worse when you try rubbing them off. However, you will succeed with the following tips! * Removing stickers: Can it be prevented to remove sticker residue? * Alternative ways to remove sticker residue * HG, the most effective way of removing a sticker Removing stickers: Can it be prevented to remove sticker residue? These days many of the products you purchase have a sticker to prevent theft. Windscreens need to have a visible toll sticker (remember when you drove to Switzerland) or a sticker that shows whether the car complies with certain environmental requirements and is allowed to enter the city centre.

There are many other examples of where you are confronted, against your will, with stickers and we all know how difficult it is to remove sticker residue from plastic or glass. Stickers can also be used as decorations, particularly by children who love to cover their bedroom door in stickers from top to bottom. To avoid having to remove every single one, you could put up a special board in the bedroom with the agreement that stickers go on that board and not on the door!
 Alternative ways to remove sticker residue HG sticker remover has been developed especially for removing stickers and also to remove sticker residue without any difficulties. This product works fast and conveniently, but you can also try one of the following household tips we found on the internet. * Nail polish remover
 Put a small amount of nail polish remover on a sponge or kitchen towel and rub it onto the sticker until it has gone completely. 
 * Turpentine
 Carefully rub the glue residues with the turpentine, leave to absorb and rub the dissolved residues away with a dry cloth.
 * Peanut butter 
Cover the entire sticker with a thumb of peanut butter. Leave to absorb and you will be able to remove the sticker residue. This method does not work on plasticised stickers
 HG, the most effective way of removing a sticker As we said before, HG sticker remover has been developed especially to remove sticker residue without any difficulties. However, this product can also be used to remove rubber adhesive, adhesive tape, tar splashes, lubricant stains, oil, heel marks and other problems from nearly all surfaces. Make sure you use HG sticker remover neat and make sure you leave it to absorb.
Tips for removing sweat smell from clothes

September 16, 2020

Tips for removing sweat smell from clothes
How to get sweat smell out of clothes | Tips for removing sweat smell from clothes clothing After washing your favourite shirt several times, you think you have finally gotten the sweat smell out. Unfortunately, after ironing or wearing your shirt again for a short time, the sweat smell is back. Despite washing it several times, the smell is still there and you ask yourself: why? In this article we will explain why and give you a few tips on how to get this sweat smell out of clothes and keep it out. * Why does sweat smell remain in clothes? * 3 tips to prevent sweat smells in clothes * 2 tips on how to get sweat smell out of clothes * Remove sweat smell from clothes with HG Why does sweat smell remain in clothes? The sweat smell in clothes that comes back as soon as the garment is ironed or worn again is caused by butyric acid.
 Everyone sweats during sports or just daily activities. As soon as the sweat dries, the so-called butyric acid, which is excreted by the body during perspiration, remains. The butyric acid continuously produces stench molecules and it is most active when the garment is warm. So when it is ironed or worn. If the butyric acid is not removed completely during washing, the sweat smell in clothes will return.

Sweat smell in clothes and other textiles can be caused by damp laundry that is left too long in the sports bag, laundry basket or in the washing machine.
 3 tips to prevent sweat smells in clothes Of course you would prefer to prevent sweat smells in your clothing. Be sure to clean your washing machine regularly so no bacteria remain. And we recommend the following if you sweat quickly and profusely.  1. Wash your armpits regularly
 If you sweat profusely, we recommend washing your armpits at least once a day. This way you remove bacteria that cause the sweat smell and you prevent the smell of sweat getting in your clothes. 2. Only wear clothes 1 day
 Do not wear your clothes more than one day and wash them more often. This prevents butyric acid from building up in your clothing. Deodorant is not an option when it comes to covering up sweat smells in clothes, because the deodorant will disappear from the clothes after time. And the sweat smell will only get worse.  3. Use antiperspirant 
If you really have a problem with sweat smells in your clothes, we recommend using an antiperspirant deodorant instead of regular deodorant. Antiperspirants contain substances that inhibit the sweat glands so there will be less perspiration (and therefore less butyric acid) in your clothes.
 2 tips on how to get sweat smell out of clothes You can try vinegar and soda to remove sweat smell in textiles as well as prevent them. 1. Soda
 Leave the garment to soak in soda and water for at least an hour and then wash it in the washing machine. The various websites do give some contradicting advice: some say “minimum one hour”, others say “overnight” in soda. In any case, be careful with coloured laundry as soda can cause discolouration.  Soda will also damage silk and wool.  2. Vinegar
 Do not let the smell of vinegar scare you! Soak your sweaty clothes in a bucket with vinegar before washing. Make sure the garment is completely submerged and let it soak for at least an hour (overnight is even better) and then wash it in the washing machine.  Have you tried the tips above on how to get sweat smell out of clothes and was it too much work or it did not have the desired effect? Then try the HG solutions developed especially for removing sweat smell from clothing and other textiles.
 Remove sweat smell from clothes with HG HG has developed a product for removing sweat odours and stains from your clothing:  HG detergent additive against unpleasant odours in sports clothing. This product is based on a highly effective formula that efficiently removes stench molecules that have penetrated deep into the fibres.

Sweat smell in (sports)clothes and other textiles can be caused by damp laundry that is left too long in the sports bag, laundry basket or in the washing machine. Main detergents are not always able to solve this problem sufficiently, but you can with this additive.
“สมาร์ทเซฟ” ความปลอดภัยต้องเด่น…ฟีเจอร์หลักต้องโดน!!!

August 03, 2020

“สมาร์ทเซฟ” ความปลอดภัยต้องเด่น…ฟีเจอร์หลักต้องโดน!!!
เพราะวันนี้…ตู้เซฟไม่ใช่แค่การดูแลทรัพย์สิน แต่ต้อง “ดูแลตัวเอง” ได้ด้วย หากเริ่มต้นมองหาตู้เซฟ…แล้วกำลังคิดถึงแต่ตู้เหล็กสี่เหลี่ยมข้างในโบกปูน ใบใหญ่ๆหนักๆ แค่นั้น…ก็นับว่าผิดถนัด! เพราะโลกที่กำลังหมุนอยู่นี้..มีสิ่งที่เรียกว่า safe อยู่หลายประเภทด้วยกัน เราได้รวบรวมสิ่งที่คุณมักจะกังวลใจ และสิ่งที่ใครหลายๆคนมักจะลังเล เกี่ยวกับตู้เซฟไว้ 5 ประเด็น ซึ่งอาจช่วยให้การพิจารณาเลือก “สมาร์ทเซฟ” นั้น…ตรงใจคุณมากที่สุดก็เป็นได้ 1️⃣ คุณสมบัติด้านความปลอดภัย คุณเคยรู้มั้ยว่าตู้เซฟควรป้องกันทรัพย์สินจากอะไรได้บ้าง? โดยหลักแล้วมีถึง 3 คุณสมบัติสำคัญกันเลยทีเดียว นั่นคือ “กันไฟ กันน้ำ และกันขโมย” นั่นหมายถึงคุณควรประเมินความเสี่ยงเบื้องต้น เพื่อรับมือกับเหตุการณ์ที่ไม่คาดฝันขึ้น โดยพิจารณาจากประเภทของทรัพย์สินหลักๆ (ซึ่งเราสามารถแยกย่อยลงไปได้อีกในแต่ละคุณสมบัติว่ากันไฟ/น้ำกี่ชั่วโมง หรือมีสัญญาณกันขโมยด้วยนั่นเอง) 2️⃣ ระบบล็อค นวัตกรรมระบบล็อคของเซฟใหม่ๆ ปัจจุบันมีให้เลือกมากกว่า 8 รูปแบบ ทั้งแบบรหัสหมุน,แบบดิจิตอล,แบบใช้งานร่วมกัน(กุญแจและดิจิตอล) ,แบบหน้าจอสัมผัส หรือรุ่นล่าสุดอย่าง ระบบสแกนลายนิ้วมือ ทั้งหมดนี้เพื่อให้ตอบโจทย์ด้านความปลอดภัยสูงสุด จากไลฟ์สไตล์ของตัวคุณ เช่น กิจกรรมหลักทำให้ต้องเปิดปิดเซฟบ่อยๆ ตู้เซฟแบบรหัสหมุนก็อาจไม่ตอบโจทย์ด้านความสะดวกได้ไม่เท่าระบบดิจิตอล หรือหากมองหาความปลอดภัยที่มีประสิทธิภาพมากขึ้น การใช้ระบบล็อค”แบบใช้งานร่วมกัน”ก็นับว่าตอบโจทย์ได้ดีทีเดียว 3️⃣ ขนาด ลองพิจารณาทรัพย์สินของคุณดูว่า มีจำนวนมากน้อยเพียงใด? และส่วนใหญ่เป็นสิ่งของประเภทไหน? เพราะการเก็บทรัพทย์สินด้วยพื้นที่ภายในที่มากพอ ก็จะช่วยให้คุณสามารถจัดการได้อย่างเป็นระเบียบมากยิ่งขึ้น หยิบจับสะดวก รวมทั้งตรวจเช็คได้ง่ายอีกด้วย 4️⃣ น้ำหนัก หลายคนคงกังวลใจในข้อนี้เป็นอย่างมาก เพราะแม้แต่ “U.S. News & World Report” ยังเคยรายงานเตือนให้เป็นข้อควรระวังในการเลือกซื้อตู้เซฟ แม้จะเคลื่อนย้ายสะดวก แต่ก็ง่ายต่อการขโมย ในเรื่องนี้ทั้งทางฝั่งอเมริกา และยุโรปเลือกลบจุดอ่อนตรงนี้ ด้วยการออกแบบฐานเซฟให้สามารถยึดเข้ากับอุปกรณ์ยึดพื้นหรือผนัง (ซึ่งบ้านเราอาจจะคุ้นชินแค่การโบกปูนทับ หรือการฝังเซฟซะมากกว่า) แต่วิธีนี้ก็นับว่าติดตั้งได้สะดวกกว่า และให้ความปลอดภัยได้ไม่แพ้กัน เพราะเมื่อติดตั้งเซฟถาวรไว้ ณ มุมใดมุมหนึ่งแล้ว ด้านหลังเซฟ(จุดที่มักถูกการทำลาย) จะถูกปิดตายในทันที!!! นั่นหมายถึงการยกระดับความปลอดภัย และคลายกังวลในเรื่องน้ำหนักได้ในเวลาเดียวกัน 5️⃣ งบประมาณ มีอะไรบ้างที่จะช่วยให้การลงทุนเพื่อการปกป้องทรัพย์สินของคุณมีความคุ้มค่ามากที่สุดอีกบ้าง – ดีไซน์อันเป็นเอกลักษณ์ ตั้งแต่การเลือกใช้โทนสี จนถึงรายละเอียดภายใน เพื่อให้สามารถใช้ประโยชน์ได้อย่างเต็มที่ – การรับประกัน มีการรับประกันอะไรให้บ้าง หรือมีความคุ้มครองอื่นๆอะไรมั้ย? – การันตีด้วยมาตรฐานสากลอะไรบ้าง? – มีตัวเลือกให้พิจารณามากแค่ไหน? และข้อสำคัญ!!! สามารถให้รายละเอียดที่คุณอยากรู้ได้ทั้งหมดนี้มั้ย? เพราะเราไม่เชื่อว่าสิ่งใดที่สำคัญ จะต้องรอให้ต้องสูญเสียบางสิ่งไป
หากเบื่อ “#คราบน้ำ” ...ก็จงนำพาร่างไปอยู่ดาวพลูโต!!!

August 03, 2020

หากเบื่อ “#คราบน้ำ” ...ก็จงนำพาร่างไปอยู่ดาวพลูโต!!!
✨ หากเบื่อ “#คราบน้ำ” ...ก็จงนำพาร่างไปอยู่ดาวพลูโต!!! แม้ในหลายบ้านจะมี “คราบน้ำ” เป็นปัญหาสุดกวนใจ ทั้งยังอยู่ใกล้เสียยิ่งกว่า ค่าฝุ่นละออง PM 2.5 หรือ ใกล้จนขนาดที่ชวนทึ่งกันได้ว่า... มนุษย์อย่างเราๆ นั้น มีวิวัฒนาการของ #การขจัดคราบ กันมานานร่วมกว่า 2,000 ปีแล้ว โดยเรื่องราวอันน่าเหลือเชื่อที่มีการบันทึกผ่านหนังสือชื่อ You need only one soap--Ivory soap ได้เผยให้เห็นกันตั้งแต่จุดเริ่มต้น... จากปฐมบทของ “ฟินิเซียน” ชาวกรีกโบราณกลุ่มแรกที่รู้จัก “วิธีการทำสบู่” จนนำไปสู่การค้นพบ “#น้ำยาทำความสะอาด” ในปี 1916 ของ Franz Gunther นักวิทยาศาสตร์ชาวเยอรมัน พร้อมการกำเนิดขึ้นอย่างเป็นทางการของ “สารลดแรงตึงผิว” อันเป็นส่วนผสมทางเคมี และมีบทบาทที่สำคัญต่อการพัฒนาสูตรกันมาจนถึงทุกวันนี้ เมื่อคราบน้ำไม่ใช่เรื่องใหม่ ก็ลองมาทำความเข้าใจ... ให้ถ่องแท้กว่าชาวฟินิเซียนกันไปซะเลยสิ!!! ▶ #CaและMgในสายธาร เปิดไทม์แมชชีน พร้อมย้อนอดีตไปสู่เรื่องราวน้ำ สมัยชั้น ป.5 ยังพอมีใครจำกันได้มั้ยว่า... เบื้องหลังความใสบริสุทธิ์ของน้ำประปาที่ยืนยันได้จากทั้ง National Academy of Sciences และการประปานครหลวง ว่า... สายน้ำธรรมชาติเหล่านี้ นอกจากสามารถใช้ได้ทั้งการอุปโภคและบริโภค โดยไม่ก่อให้เกิดอันตรายแล้วนั้น ใน “#น้ำกระด้าง” หรือชื่อที่คุ้นหูว่า “น้ำประปา” ยังอุดมไปด้วยแร่ธาตุอย่างแคลเซียม และแมกนีเซียมอยู่เป็นจำนวนมากที่มีประโยชน์ต่อร่างกายอีกด้วย ▶ #กาลเวลาและปฏิกิริยาตามธรรมชาติ ก่อนสายน้ำอันเสมือนเส้นนำทางแห่งชีวิต จะถูกนำไปใช้ประโยชน์เพื่อการดื่มกิน และปรณิบัติชำระล้างต่างๆ นาๆ นั้น ในระหว่างที่ผ่านวิถีแห่งกาลเวลา ได้เกิดปฏิกิริยาตามธรรมชาติ จนเป็นเหตุให้แร่ธาตุส่วนใหญ่ของทั้งสองชนิดนี้ (แคลเซียมและแมกนีเซียม) เกิดการตกตะกอนขึ้น ณ จุดใดจุดหนึ่ง ซึ่งนับเป็นร่องรอยของกระบวนการทางเคมี หรือตามสิ่งที่เราเข้าใจ และเรียกกันจนติดปากว่า “คราบน้ำ” ซึ่งการปล่อยคราบน้ำ หรือคราบเกลือนั้นๆ ทิ้งไว้นานวัน ก็จะกลายผันเปลี่ยนหน้าปรับตาเป็น “#คราบหินปูน” ลักษณะผลึกแข็งคล้ายซีเมนต์ หรือคราบชอล์คสีขาวๆ (ลองสังเกตุได้ตามก็อกน้ำ ฝักบัว หรืออ่างล้างมือ) หรือหากผ่านการให้ความร้อนอย่างกาต้มน้ำ และเครื่องชงกาแฟ ก็จะเห็นเป็นเกร็ดสีขาวๆ เกิดขึ้นโดยรอบในชื่อของ “คราบตะกรัน” ยิ่งคราบพวกนั้น เข้าไปฝังแน่นตามความพรุนของพื้นผิว หรือผ่านการชะล้างที่สะสมไว้ทั้งคราบไคล ไขมัน และสิ่งสกปรกต่างๆ จนอาจพบการจับตัวเป็นเมือกๆ หรือคราบเหลืองๆ ร่วมด้วยแล้ว ยังสามารถสร้างความเสียหายแก่ทั้งวัสดุภายใน และยากต่อการกำจัดอีกด้วย (ท่อระบายน้ำ อ่างล้างมือ เครื่องซักผ้า ฯลฯ) ▶ #ว่ากันตามกูรูฉบับดั้งเดิม แม้จะก้าวเข้าสู่ปี 2019 แล้วก็ตามที แต่สารพันวิธีของการขจัดคราบต่าง ๆ กลับยังวนเวียนอยู่บนความเข้าใจในแบบฉบับออริจินัล ด้วยการให้ทดลองใช้พระเอกครอบจักรวาลอย่างโซดาไฟ หรือน้ำส้มสายชูโดยทันที แม้ว่าจะรู้กันเป็นอย่างดี ถึงเรื่องกลิ่น และฤทธิ์ของความเป็นกรด แต่ด้วยการให้ผลลัพธ์แทบจะในทันตาเห็น จึงมักกลายเป็นคำตอบของใครๆ ที่มักจะมาก่อนความเข้าใจอยู่เสมอ พร้อมเหตุผลสนับสนุนในราคาที่ซื้อง่ายหาง่าย และบ้านไหนๆ เขาก็ใช้กัน จนบางครั้ง... ก็อาจลืมอะไรบางอย่างไป! ▶ #ไม่เคยมีหมอคนไหนให้ทำคีโมเพราะคุณเป็นไข้หวัด หากเปรียบบ้านแสนรักดั่งตัวคุณ เปรียบจุดที่เกิดคราบน้ำดั่งอาการคัดจมูก... ฉะนั้น การทำคีโมก็อาจยังมิใช่คำตอบของการรักษา เพราะนอกจากจะไม่ตรงจุดแล้ว ด้วยฤทธิ์ของยาที่รุนแรง ยังอาจส่งผลต่ออวัยวะภายในส่วนอื่นๆ ได้อีกด้วย ซึ่งนับเป็นหลักการที่ใกล้เคียงกับการขจัดคราบที่ถูกต้องเป็นอย่างมาก เพราะการเริ่มต้นด้วยน้ำยาที่มีฤทธิ์เข้มข้นสูง และรุนแรงจนเกินไป สุดท้ายก็อาจเป็นผลเสีย และย้อนกลับไปทำลายจุดอื่นๆ แทนได้ทั้งวัสดุต่างๆ รวมทั้งกลุ่มยาแนว ซิลิโคน หรือพลาสติกบางชนิด อีกด้วย (ฉลากของ HG จึงมีคำแนะนำอยู่บนฉลากว่า ควรทดสอบบนพื้นที่เล็กๆ ก่อนเสมอ) เมื่อ “คราบน้ำ” สุดกวนตา... กลับกลายเป็นเรื่องธรรมดาสุดกวนใจ และสามารถเกิดขึ้นได้ในทุกๆ ที่บนโลก การดูแลด้วยผลิตภัณฑ์ทำความสะอาดต่างๆ จึงนับเป็นของคู่กันที่เกิดมานานนับตั้งแต่อดีตกาล ฉะนั้น... การหนีไปดาวพลูโต จึงอาจเป็นคำตอบของคนที่ไม่ค่อยชอบความสะอาดก็เป็นได้
Tips to clean your washing machine

July 13, 2020

Tips to clean your washing machine
How to clean your washing machine? | Tips to clean your washing machine bathroomwashing machine Cleaning your washing machine, is that really necessary? Yes! Even washing machines can become dirty in time, often in areas you cannot see, and this decreases their cleaning performance. Without cleaning your washing machine, your clothes do not get as clean and you may even have to wash them a second time. You will find various tips on the internet for cleaning your washing machine as well as ways to prevent problems caused by a dirty washing machine. * Tips to prevent having to clean your washing machine * Get started with cleaning your washing machine * HG solution for cleaning the washing machine * Why clean the washing machine regularly? * Washing at a low temperature Tips to prevent having to clean your washing machine Your washing machine probably looks clean. But you still need to deep clean your washing machine occasionally, because after every wash a bit of limescale, soap and dirt remain in the washing machine.

HG service engineer for washing machines and dishwashers prevents build up in hard to see and hard to reach areas, such as filters, floats and drainage pipes. And this means a longer lifespan for your washing machine. If you do not clean out your washing machine, problems such as the following can gradually occur : * Wash does not get clean * Programme takes too long * Machine does not heat properly * Machine continues to pump water or even a defective heating element HG service engineer ensures that the rubber seals in your washing machine remain flexible and watertight so that there is no leakage, defect or short circuiting.
 Get started with cleaning your washing machine We found 2 household solutions on blogs for cleaning the washing machine According to blogs, there are a few DIY methods for cleaning your washing machine and keeping it clean.
 1. Hottest setting 
Some blogs say you can descale and deep clean your washing machine by occasionally running it at 90 degrees. This has a softening effect. While cleaning the inside of the washing machine, you can also put a dishwashing tablet in the drum for even more deep cleaning. 2. Vinegar
You can try using vinegar to descale your washing machine. Clean out your washing machine by running it empty at 60 degrees. Have you tried the tips above on how to deep clean your washing machine and had little or no success? Then try the various solutions from HG developed especially for washing machine cleaning.
 HG solution for cleaning the washing machine HG has asolution for cleaning the washing machine. The HG service engineer for washing machines and dishwashers is mainly for preventing problems with the washing machine. It thoroughly cleans the parts that are not visible so problems are prevented and your washing machine will keep running smoothly.
  Why clean the washing machine regularly? Grease and soap build up is one of the reasons you need to clean out your washing machine regularly. Skin grease, soap and skin cells and other dirt can clump together to form blockages. This can cause your laundry to smell less fresh.
Fridge cleaning | How to properly clean your fridge

July 13, 2020

Fridge cleaning | How to properly clean your fridge
Fridge cleaning | How to properly clean your fridge kitchenrefrigerator Is it time to clean your fridge again? Do not procrastinate; that is unhygienic and you certainly do not want that in a place where you store food. Fortunately, there are several ways to make this chore a little bit easier. On this page we give you various tips on how to prevent the refrigerator from becoming dirty and smelly, but also teach you the best way to clean your fridge. * Causes of unpleasant odours in the refrigerator * 5 fridge cleaning tips to prevent a smelly refrigerator * Thorough and hygienic fridge cleaning * More about the hygienic refrigerator cleaner from HG. Causes of unpleasant odours in the refrigerator Bad odours in the refrigerator are caused by a number of things. How is it possible that these unpleasant odours can remain, even when you clean your fridge regularly? 1. The refrigerator itself
The refrigerator has a hole in the back for draining water. This hole leads to the tray above the compressor at the back. The water then dries up thanks to the heat from the compressor in the refrigerator. This is no problem when it is just water, but when it is other liquids, such as juice, this can result in unpleasant odours.  2. Mould
Mould may also be the cause. Mould grows in the smallest, most inconspicuous places and can spread unpleasant odours.  3. Rotting food
In addition to mould and the drainage hole in the back wall, rotting food can also cause a smelly fridge. This bad odour can spread through your entire refrigerator and remain for a long time, even after the rotting food has been thrown away.   5 fridge cleaning tips to prevent a smelly refrigerator The following tips will help you keep your fridge as clean as possible and prevent unpleasant odours. 1. Paper towels in the refrigerator
To avoid extra fridge cleaning, lay two paper towels in the fridge door. These will catch any droplets and help prevent rings. The fridge door will remain clean. 2. Prevent unpleasant odours in the refrigerator
Put a shallow bowl of baking soda in your refrigerator to help prevent unpleasant odours. Baking soda will absorb the bad smells. 3. Set the fridge to the correct temperature.
Make sure your fridge is set at the right temperature. The advice is to set the temperature between 3° C and 4° C. This prevents the inside of the fridge from becoming too warm and products begin to go bad. Did you know that 25% of households do not have their fridge set at the correct temperature? 4. Check the contents of your fridge regularly
Check the products in your refrigerator regularly so that any rotting food can be thrown out quickly. 5. Containers for products such as cheese and sandwich meats
Use containers for, for example, meat and (French) cheese to prevent their odours from spreading through the entire refrigerator as well as to keep them fresh as long as possible.  Thorough and hygienic fridge cleaning Follow these steps for the best way to clean your fridge: 1. Turn off and unplug the refrigerator.
2. Check the expiry date on all the products and remove those that have expired. Check products that do not have an expiry date, such as fruit, for any signs of rotting.
3. Start by cleaning the refrigerator. Remove shelves and glass plates where possible and clean them with soap and water or, even better, with HG hygienic fridge cleaner.
4. Then clean the rest of the fridge with a clean cloth with warm water and washing-up liquid or the special HG hygienic fridge cleaner. Do not forget the rubber closures in the door.
5. If you used soap and water it is important to make sure that the entire fridge is dry before putting everything back in. Use a clean tea towel to dry the inside of the refrigerator very well. If you have a free-standing fridge that is not built in, then it is also important to clean the back of the refrigerator regularly as well. Lots of dust collects there and increases power consumption: all the dust means the cooling mechanism has to work harder. Remove dirt and dust carefully with a vacuum cleaner (low setting) or a soft broom. More about the hygienic refrigerator cleaner from HG. HG hygienic fridge cleaner keeps the inside of any refrigerator clean. This fresh-smelling fridge cleaner spray is ideal for quick and hygienic fridge cleaning without streaks. It is easy to apply, leaves a fresh smell and drying is unnecessary because HG hygienic fridge cleaner is fast drying. So your fridge cleaning chore is done much faster than with just soap and water. And do not forget the built-in freezer. If you do not keep an eye on the built-in freezer, you can get a lot of ice build-up. All of this extra ice means your refrigerator has to work much harder to maintain the cold temperature, which means higher electricity bills. So during your fridge cleaning, remember to clean the freezer too! Let the ice melt or use HG freezer de-icer to melt it super-fast, so frozen foods do not have time to thaw.
ดีไซน์ “แถบป้องกัน” ดับฝัน “โจรงัดเซฟ!!!”

June 23, 2020

ดีไซน์ “แถบป้องกัน” ดับฝัน “โจรงัดเซฟ!!!”
อยากรู้สันดาน โจรงัดเซฟ รีบทำความรู้จัก “Pry-resistance hinge bar” ซะ!!! เพราะเรื่อง “บานพับด้านนอก” ที่มักถูกถกหยิบยกขึ้นมา เป็นประเด็นพิจารณาของตู้เซฟกันไฟแล้ว อีกเกือบร้อยทั้งร้อย ก็มักจะตั้งคำถามในแบบเดียวกันทำนองว่า “แล้วยังงี้ แค่โจรตัดบานพับได้… ก็จบเห่ละสิ?” ใช่แล้วล่ะ “จบจริง” แต่จบแค่ตรง ตัดบานพับ ก่อนนะ เพราะในภาพถัดมา มันจำต้องพัลวัลพลันเร่ง งัด ยัด แยง ด้วยชะแลงอีกซักหน่อย พร้อมให้เวลากันอีกสักเล็กน้อย แล้วในไม่ช้า… เซฟใบนั้น…ก็อาจกลายเป็นแค่กล่องกระดาษในชั่วพริบตา! ถ้าไม่อยากให้ฝันร้ายต้องกลายเป็นจริง ลองสังเกตุดูวลีที่มีคำว่า “ซักหน่อย” สันดานโจรจะเข้าใจในทันทีว่า… “เมื่อใดที่บานพับนั้นถูกตัดออก การงัดก็จะใช้เวลาอีกเพียงไม่นาน ซึ่งแทบจะเตรียมกวาดทรัพย์สินได้ในทันที!” ทำไมน่ะเหรอ? ก็เพราะจุดนี้ในทางเทคนิคนั้น… นับเป็นอีกหนึ่งจุดอ่อนของตู้เซฟแบบเดิมๆ ที่ง่ายต่อการโจรกรรมมาโดยตลอด! SentrySafe จึงดีไซน์ “Pry-resistance hinge bar” เข้ามา เพื่อขีดฆ่าคำว่า “ซักหน่อย” ให้ค่อยๆ ตายหายไปพร้อมกับโจรงัดเซฟ โดยมีลักษณะพิเศษที่เป็นแถบซี่หนาๆ (ดูคล้ายแปรงหวีผม) ถูกวางเรียงต่อกันตลอดแนว พร้อมออกแบบพื้นที่ระหว่างบานพับกับประตู ให้สามารถปิดรับกับแถบดังกล่าวได้อย่างพอดี ซึ่งแถบป้องกันนี้ พร้อมทำหน้าที่เป็นตัวล็อคให้กับเซฟอีกชั้นหนึ่ง ให้สามารถป้องกันการงัดได้อย่างมีประสิทธิภาพ (แม้แต่อุปกรณ์ขนาดเล็กอย่างไขควงก็ตามที) และเมื่อผสานเข้ากับกลอนสลักขนาดใหญ่ พร้อมระบบล็อคคุณภาพสูงด้วยแล้วนั้น การรังสรรค์คุณสมบัติ “การกันขโมย” 1 ใน 3 ฟีเจอร์หลักของเซฟกันไฟ Sentry Safe ก็ไม่เคย “จบจริง” แค่ที่เรื่องของ บานพับด้านนอก อย่างที่ใครเค้าบอกกัน
Tips for a clean microwave Cleaning the microwave

June 22, 2020

Tips for a clean microwave Cleaning the microwave
How to clean microwave? Tips for a clean microwave Cleaning the microwave. It may not be a fun job, but a dirty microwave is of course not very hygienic to use for cooking or heating up food. Fortunately, there are various ways to clean the microwave, but we also have a few tips to help you prevent a very dirty microwave. * 5 tips for preventing a dirty microwave * Dirty and smelly microwave causes * How to clean the microwave * HG is thé solution for a clean microwave 5 tips for preventing a dirty microwave The microwave is of course ideal for warming up food. But if used often, it can get very dirty and not work as well as it should.So of course you want to prevent your microwave from getting dirty, so you have the least amount of work and prevent microwave smells. When food is heated up in the microwave it can spatter against the walls and stick to the inside of the microwave. Use a microwave-safe lid to prevent this. The tips below will help you keep your clean microwave even cleaner. 1.Use a microwave-safe lid
As we said before, you can use a microwave-safe lid to prevent spattering. 
  
2.Note the duration
To maintain a clean microwave and avoid excessive spattering, pay close attention to the time when heating up food.

 3.Heat on a low setting
For example, it is best to heat up peas, sausages, carrots or corn at a low setting. Stirring a couple of times will help heat up the food more gradually, which will help prevent spattering.  If the heated food does spatter, we recommend cleaning the microwave immediately before the food has time to get caked on.
 Dirty and smelly microwave causes As described above, a dirty and smelly microwave is mainly caused by food spatters when it is heated at too high a temperature. Or spills when food is placed in or taken out of the microwave. Grease and food remains become caked on, making it very difficult to clean the microwave. Therefore, the best way to clean your microwave is frequently, so you will avoid long, hard scrubbing to get rid of microwave smells. 
 How to clean the microwave 4 ways to clean the microwave Volgens diverse websites en blogs zijn verschillende middelen die u kunt uitproberen voor het reinigen van de magnetron. 1.Ammonia
Use ammonia to clean your microwave. Fill a small bowl with water and a small amount of ammonia and place it in the centre of the microwave.  Run the microwave for 10 minutes at 800 watts. Then wipe the microwave clean with a cloth. The disadvantage is that the ammonia smell can remain in your microwave and even penetrate into your food.

 2.Lemon juice
Fill a small bowl with water and add some lemon juice. Run the microwave for 5 minutes at the highest setting. The caked-on food will eventually come loose and you can remove it. Lemon also provides a fresh scent.  
 3.Soda
Some people also recommend soda as a cleaning agent for the microwave. If you want to try this, put a small bowl of water with 2 tablespoons of soda in the microwave.

Run the microwave for about 5 minutes at the highest setting and then simply wipe away the grime. 4.Dishwasher tablet
If the solutions above do not work, then you can always try using a dishwasher tablet. Here you also need a small bowl of water to put the dishwasher tablet in. Then run the microwave for 5 minutes and wipe it clean with a cleaning cloth afterwards.  Have you tried the tips above on how to clean the microwave and had little or no success? Then try the HG solution developed especially for the easiest, most effective and best way to clean the microwave.
 HG is thé solution for a clean microwave Want to clean your combination microwave quickly and effectively? HG grease away easily removes grease and caked-on food in microwaves and combination microwaves. This handy and powerful spray cleaner is safe to use on all materials in the microwave.
“Lifetime Warranty” คำๆ นี้ ไม่มี “หมด passion‼”

June 21, 2020

“Lifetime Warranty” คำๆ นี้ ไม่มี “หมด passion‼”
แล้วอะไรกันล่ะ… คือ ความหมายที่ซ่อนอยู่เบื้องหลังตัวเลขเหล่านั้น? หรือแท้จริงแล้ว เรากำลังได้รับประโยชน์จากสิ่งที่ผู้ผลิตมอบให้กันมากน้อยเพียงใด? เราลองย้อนเวลากลับไป ในเหตุการณ์ครั้งสำคัญของอุตสาหกรรมกุญแจ ช่วงเดือนกันยายน ปี 1999 Master Lock ได้สร้างเซอร์ไพรซ์ด้วยการรับประกันสินค้า “Lifetime Warranty” ให้กับกุญแจเรือธงรุ่น “380T” ที่นำเอาเทคโนโลยี Corrozex finish (สิทธิบัตร The Rust-Oleum®) มาผสานเข้ากับโครงสร้างของวัสดุลามิเนต ซึ่งทำให้กุญแจมีคุณสมบัติการป้องกันสนิมได้อย่างสูงสุด (ซึ่งในยุคนั้น มีการคาดการณ์ว่า กลุ่มบ้านพักอาศัยส่วนใหญ่ จะมีการเปลี่ยนกุญแจกันทุกๆ 5 ปี เนื่องจากปัญหาการขัดข้องของกลไก ที่มักมีสาเหตุมาจากการกัดกร่อนของสนิมนั่นเอง) และในขวบปีถัดมา ก็มีการต่อยอด พร้อมจดสิทธิบัตรการผลิต ภายใต้ชื่อรุ่น “DAT Titanium Tough Padlock” ซึ่งเป็นกุญแจที่ผลิตจาก “ไทเทเนียม” ชนิดเดียวกับที่ใช้ในอุตสาหกรรมอากาศยาน มีจุดเด่นในเรื่อง การไม่เกิดสนิม แข็งแรง และเบากว่าเหล็กหลายเท่า จึงประสบให้แบรนด์กุญแจยักษ์ใหญ่แห่งแดนลุงแซมรายนี้ กลายเป็นดาวจรัสแสงในช่วงข้ามปี ตลอดจนเป็นที่รู้จัก และอยู่ในความสนใจโดยเฉพาะในหมู่วัยรุ่นเป็นอย่างมาก และในความโดดเด่นนี้เอง ก็ยังถูกเพิ่มเติมด้วยการการันตีตัวกลไก โดยสามารถเคลมได้ “ตลอดอายุการใช้งาน” เมื่อเกิดปัญหากันเลยทีเดียว คำว่า “Lifetime Warranty” จึงมีการตีตราสัญลักษณ์ที่ปรากฏอยู่บนผลิตภัณฑ์ของ Master Lock เกือบทุกรุ่นนับตั้งแต่นั้นเป็นต้นมา และ passion หรือที่เรียกกันว่า ความบ้าคลั่ง นั้น หากนับแต่ในเรื่องของ กุญแจ… Master Lock ก็ยังคงยึดมั่น และดำเนินอยู่จนถึง ณ ปัจจุบัน ผ่านผลงานล่าสุด การันตีด้วยรางวัลระดับโลก Edison Awards อย่างเจ้า Master Lock Bluetooth® Padlocks กุญแจที่สามารถทำงานร่วมกับสมาร์ทโฟนได้อย่างลงตัว แม้ว่าเรื่องราวข้างต้นนี้ อาจจะดูไกลตัวไปซักนิดนึง หากแต่ทราบว่า สินค้าทุกชิ้นที่เราหยิบจับขึ้นมา ยังคงซ่อนไว้ด้วยมาตรวัดด้านความใส่ใจจากฝั่งผู้ผลิต แม้จะอธิบายมาในรูปของ “การรับประกัน” ก็ตาม บางที… การรับประกันที่ดีที่สุด ก็มิอาจสามารถประเมินเป็นตัวเลขได้‼ ✨ Lifetime Warranty ✨ จึงมีมากกว่าแค่สตอรี่ หรือความเป็นนิจนิรันดร์ แต่ต้องสามารถสัมผัส และจับต้องได้ด้วย‼
Blocked drain? The best tips to learn how to unblock a drain

June 14, 2020

Blocked drain? The best tips to learn how to unblock a drain
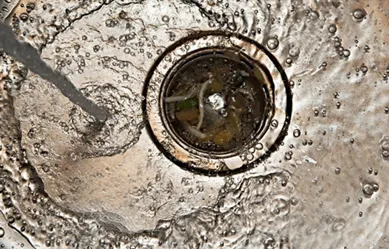
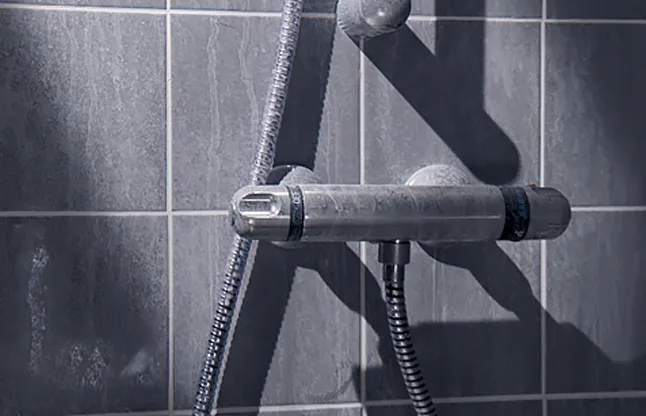
Blocked drain? The best tips to learn how to unblock a drainDo you have blocked drains? Food remains are often the biggest cause of a blocked kitchen sink and for blocked shower drains the cause is often hair or soap remains. Wipe plates clean with a paper towel before doing the washing up and remove hair from blocked shower drains. In addition to these tips, we also have advice for preventing blocked drains in the kitchen and blocked shower drains as well as a guide on how to unblock a drain.  3 tips for preventing a blocked drainThe following tips will help prevent blocked drains in the kitchen, toilet and bathroom. 1. Prevent food remains from getting in the sink It is important to first wipe plates clean with a paper towel before rinsing them off. Put an extra filter above the drain to prevent food remains from getting into the drain. Never pour frying oil in the drain, pour it back into the bottle. 2. Your drain is not a bin Be careful of what and how much ends up in your drain. For example, do not flush large amounts of toilet paper at one time. Feminine pads, tampons and certainly diapers belong in the bin and certainly not in the toilet. 3. Clean shower drains and sinks Hair, soap remains and skin grease are often the cause of blocked shower drains and sink drains. Remove hair from the drain regularly and keep the shower and sink clean to prevent a blocked shower drain and a blocked sink. How to unblock a drain? 3 household remedies to learn how to unblock a drain Various websites and blogs mention several household remedies for dealing with blocked drains. Note: these methods do not guarantee success: 1. Soda and hot water One of these household remedies is soda. Take a handful of soda and throw it in the blocked drain. Then pour hot water in the blocked sink or drain. Soda does not help? Then you can try this in combination with vinegar. After using these products, you must pour a minimum of 1 litre of boiling water into your drain. 2. Cola Cola is not only for removing rust, it supposedly also works for blocked drains. Pour an entire bottle of cola in the blocked drain. Wait 15 to 30 minutes and then pour a minimum of 1 litre of boiling water into the blocked sink. Again, with serious blockages this method does not always work. 3. A plumber's snake This can be used when the clog is deeper down in the pipes. The flexible steel cable bends to fit through the pipes. Push the plumber’s snake as far down the drain as you can and then turn the hand spinner. The turning motion dislodges the blockage and unblocks the drain. Did you try the methods above but did not get the desired results or found it to be too much work? Then try the various solutions from HG developed especially for blocked drains. HG solutions for blocked drains HG has various solutions for blocked drains. First is HG liquid drain unblocker, a ready-to-use unblocker for toilet, shower or sink. It works thoroughly and effectively and does not affect plastic pipes. Do you have a serious blocked drain or a blocked sink in the kitchen? Then we recommend HG duo unblocker. This unblocker is suitable for the most stubborn blockages in the kitchen sink or wash basin and will even unblock shower drains. A blocked sink in the kitchen is often caused by grease and food remains. Use the special HG kitchen drain unblocker for this. HG kitchen drain unblocker works on the basis of natural micro-organisms which, so to speak, eat through the blockage and can therefore always deal effectively with any kind of blockage. Blocked sink or blockage in the bathroom? Many blockages in the bathroom are caused by hair that also retains soap, skin grease and toothpaste. HG hair unblocker is the best product for these blocked drains.

To remove bad smells in kitchen or bathroom drains, we advise HG drain odour remover. Causes of blocked drains A blocked drain or blocked sink can occur often, but what exactly causes a blocked sink? Blocked sink in the kitchen 
As we already said, food remains in the drainpipes are the main cause of a blocked sink in the kitchen. The food remains in the pipes and finally causes a blocked kitchen sink. And soap remains are a big culprit in the bathroom in particular. These soap remains build up, making the drain narrower and narrower with time. Grease, food remains and limescale can also cause a blocked sink in the kitchen. Blocked toilet Toilet paper, tissues or toilet bowl cleaners can cause limescale, also a cause of blocked drains in the wc. Limescale can build up and lead to a blockage which blocks the drain. The cause of the blocked drain can also be outdoors, for example, an overfull sceptic tank or blocked drain pipes near the tank. Blocked drains in the bathroom Hair is the number one cause of a blocked shower drain and other bathroom blockages. Shaving and washing, styling hair all mean hair in the shower drain or sink. And this cannot be prevented, the only solution is to unblock the shower drain. Hair can accumulate and finally lead to a blocked shower drain. Soap remains and skin grease are also major causes of blocked drains.
รู้ก่อนใคร!!! อีกหนึ่งมิติใหม่ของ “Social distancing” ในอเมริกา

June 10, 2020

รู้ก่อนใคร!!! อีกหนึ่งมิติใหม่ของ “Social distancing” ในอเมริกา
รู้ก่อนใคร!!! อีกหนึ่งมิติใหม่ของ “Social distancing” ในอเมริกา เมื่อพิษภัยของ COVID-19 กำลังนำพาให้เหล่ามวลมนุษยชาติจำต้องก้าวเดินต่อไป บนไลฟสไตล์รูปแบบใหม่ที่ใครๆ ต่างก็เรียกว่า “New normal” กันอยู่ในขณะนี้ . จึงทำให้ในหลายมลรัฐของอเมริกา ต่างร่วมกันค้นหามาตรการที่เหมาะสม เพื่อความปลอดภัยในชีวิตและทรัพย์สินของคนทุกคน ตั้งแต่ขั้นตอนของการแจกจ่ายหน้ากากอนามัย (PPE), การเข้ารับการตรวจรักษา รวมทั้งการปรับรูปแบบการดำเนินชีวิตประจำวัน . ซึ่งหนึ่งใน “New normal” ที่ได้รับการพูดถึงผ่าน PRNewswire บริษัทด้านการสื่อสาร และประชาสัมพันธ์ชั้นนำของโลกนั้น ก็คือ การใช้ “กล่องเก็บกุญแจบลูทูธ” ที่ได้รับการสนับสนุนจากมาสเตอร์ล็อคมากกว่า 1,000 ตัว ทั่วสหรัฐอเมริกานั่นเอง!!! . โดยเฉพาะกับบุคลากรที่อยู่ในชั้นแนวหน้า ทั้งทางการแพทย์ และกลุ่มธุรกิจร้านค้ารายย่อยที่มีความเสี่ยงต่อการติดเชื้อ ถึงแม้ว่าจะมีมาตรการควบคุมอย่างเคร่งครัดออกมาแล้วก็ตามที . เพราะแกดเจ็ด (Gadget) ดังกล่าวนั้น สามารถตอบโจทย์ได้เป็นอย่างดี ทั้งในด้านการใช้งานที่สะดวก มีความปลอดภัยสูง และยังช่วยให้ผู้ใช้งานสามารถลด หรือหลีกเลี่ยงจากการสัมผัสสิ่งของกันโดยตรงได้อีกด้วย - พื้นที่กล่องเก็บมีขนาดความจุเพียงพอต่อการฝาก หรือเก็บของสำคัญไว้ให้กับคนอื่นได้ในเวลาที่ต้องการ (โดยที่ไม่ต้องหลบซ่อน) เช่น กุญแจ คีย์การ์ด เอกสารต่างๆ ฯลฯ - ใช้งานได้อย่างมั่นใจ ทั้งการปลดล็อคผ่านระบบบลูทูธของสมาร์ทโฟน หรือการกดรหัสบนแป้น LED ของกล่องเก็บกุญแจ (หากโทรศัพท์ไม่อยู่กับตัวหรือในกรณีฉุกเฉิน) - พร้อมตรวจสอบการใช้งานผ่านแอปพลิเคชัน “Master Lock Vault eLocks” ด้วยฟีเจอร์ต่างๆ ทั้งประวัติการเข้า-ออก การเข้าถึงโดยไม่ได้รับอนุญาต หรือการแจ้งเตือนเมื่อมีแบตเตอรี่ต่ำ - รุ่น 5440D สามารถติดตั้งการใช้งานได้ในทันที หรือเลือกใช้รุ่น 5441D ที่สะดวกต่อการพกพา หรือเปลี่ยนตำแหน่ง เพราะห่วงล็อคสามารถเปิด/ปิดได้ - พร้อมใช้งานได้ทั้งในระบบ IOS และ Android - มีคุณสมบัติการกันน้ำ สามารถใช้งานได้ทั้งภายใน และนอกอาคาร ข้อมูลผลิตภัณฑ์เพิ่มเติม https://www.naradee.com/index.php?route=product/category&path=2_34 ref https://www.prnewswire.com/news-releases/master-lock-announces-product-donation-to-help-protect-frontline-healthcare-first-responder-and-
Tips for limescale prevention

June 04, 2020

Tips for limescale prevention
Tips for limescale preventionOf course you want to avoid limescale, especially on taps. The following tips will show you how to prevent limescale.  1. Limescale prevention with cleaning productsTo prevent limescale in the toilet, from taps, from the shower, sink or bath, we recommend having a cloth with some cleaning product on hand when you take a shower. This way you can clean the shower walls while showering. Then rinse the walls with hot water after showering and dry the shower cubicle.  HG shower & washbasin spray is the number one daily cleaner because it not only removes light limescale but skin grease and soap remains as well. 2. Water softenerYou can install a water softener to your water pipes; install it directly after your water meter or as close as possible. This water softener (and the built-in calcium filter) softens the water so that it contains less calcium. Unfortunately, this is an expensive solution and not affordable for everyone. How to get rid of limescaleLimescale prevention is next to impossible, because where there is water, there is limescale. Only the speed in which limescale builds up varies, because the water in some areas contains low levels of calcium and magnesium (soft water) and others contain high levels of calcium and magnesium (hard water). This is why we have various limescale removers in our assortment. 3 ways to remove limescaleVarious blogs have lots of DIY tips for removing limescale on taps and other surfaces. We selected a few of the best ones. 1. Cola
Cola is sometimes considered a cure all, and removing limescale is one of those cures. Cola can be used to remove limescale from the toilet bowl. Pour cola in the toilet bowl and leave it there overnight. Flush the toilet the next day. 2. Buttermilk
 Moisten a tea towel with buttermilk and put it on the area with limescale. Leave it there overnight and you should be able to rinse away the limescale the next day. 3. Fabric softener
 You can also use fabric softener to remove limescale from taps and bathroom tiles. Pour a drop of fabric softener in a bucket of warm water and use this to wipe off the tiles, Leave it to work for a bit and then rinse well with hot water.  Have you tried the tips above for removing limescale and had little or no success? Then try the HG solutions developed especially for getting rid of limescale. Remove limescale effectively with HGHG has several solutions for removing limescale, such as HG professional limescale remover. This limescale remover is a strongly concentrated descaler that removes limescale and limestone. This limescale remover is suitable for bathtubs, toilets and shower walls and can also to remove limescale from taps and your showerhead. This concentrated limescale remover also removes rust stains, uric acid and verdigris. HG professional limescale remover is also available in 500ml and 1L. HG scale away foam spray and HG scale away foam spray with powerful green fragrance remove limescale from the toilet, taps and more quickly and thoroughly and leave your home smelling fresh. HG limescale removers remove limescale, which creates a dull haze, from tiles, shower cubicles, plastic bathtubs, washbasins, taps, showerheads and kitchen worktops. Our limescale removers create a thick foam for a longer working time and it does not affect chrome, glaze and grout. In addition to HG scale away foam spray and HG scale away foam spray with powerful green fragrance, we also have HG scale away foam spray 3x stronger for removing extremely stubborn scale.
ตู้เซฟของคุณ... พร้อมจะให้พวกมันขโมยหรือยัง?

June 04, 2020

ตู้เซฟของคุณ... พร้อมจะให้พวกมันขโมยหรือยัง?
ตู้เซฟของคุณ... พร้อมจะให้พวกมันขโมยหรือยัง? “เมื่อกลางดึกคืนหนึ่ง ขณะที่เจ้าของนั้นนอนอยู่บนชั้นสอง ได้ถูกโจรบุกงัดรั้ว ปีนหน้าต่าง แล้วย่องตรงเข้ามาที่เคาน์เตอร์ชั้นล่างซึ่งเปิดเป็นร้านขายของ และหลังจากนั้นเพียงไม่นาน ตู้เซฟที่ถูกวางไว้ใต้ชั้นแคชเชียร์ก็ถูกยกออกไปอย่างใจเย็น ซ้ำยิ่งช้ำใจหนัก เมื่อหลักฐานนั้น กลับถูกพบเข้าอีกทีในรุ่งเช้า ณ พื้นที่ไม่ไกลจากตัวบ้าน ในสภาพโดนทุบทำลาย และสูญเสียทรัพย์สินไปทั้งหมด หากแต่เหลือทิ้งไว้เพียงเอกสารอย่างกระจัดกระจายให้ดูต่างหน้า” หนึ่งในพฤติการณ์ที่ยังคงวนเวียนดั่งวัฏจักรในโลกของการโจรกรรมโดยเฉพาะกับบ้านเรา แต่เหตุใดกัน? ทำให้มันมักจะเกิดขึ้นอยู่ซ้ำแล้วซ้ำเล่าอย่างไม่มีทางจบสิ้น แล้วเครื่องหมายคำถามในห้วงความคิดแรกเริ่มที่ทำให้คุณเดินหน้า และตัดสินใจเลือกซื้อตู้เซฟสักใบ คือ อะไร กัน แน่? เพราะนอกจากการตอบคำถามที่ตรงกับใจได้แล้ว คุณอาจจำเป็นต้องเข้าใจในหลักการบนพื้นฐานของความเป็นจริงด้วยว่า ตู้เซฟที่ถูกสร้างขึ้นมาบนโลกนี้ ก็เพื่อการตอบสนองในการดูแลทรัพย์สินต่างๆ ด้วยคุณสมบัติเด่นๆ ที่มีให้เราได้เลือกพิจารณากันอยู่เพียงแค่ 3 ประการเท่านั้น คือ การกันไฟ การกันน้ำ และการกันขโมย ซึ่งหากย้อนกลับยังเหตุการณ์ในเบื้องต้น มูลเหตุสำคัญให้ตัวเจ้าของบ้านยกขึ้นมาพิจารณาในการเลือกซื้อเซฟนั้น ก็คงมีไว้เพื่อจัดการระบบเงินสด และทรัพย์สินมีค่าที่ต้องใช้เป็นประจำวัน แต่ในหัวข้ออย่าง “การกันขโมย” นั้น ก็ควรได้รับการพิจารณาก่อนจะคุยกันถึงคุณสมบัติอื่นๆ ด้วยเช่นเดียวกัน หมดยุคแล้ว!!! หากวันนี้คุณยังคงวนเวียนอยู่แค่เพียงคำถามของเรื่องน้ำหนัก และขั้นตอนของการตั้งค่ารหัสแบบทั่วๆไป เพราะตู้เซฟในวันนี้ที่เคยถูกขโมยด้วยการอุ้มออกไปก็มักเป็นตู้เซฟขนาดกลางๆ ที่มีน้ำหนักราวๆ กว่า 100 กิโลกรัม แทบจะทั้งสิ้น ซึ่งหัวข้อหนึ่งที่ผู้คนส่วนใหญ่มักจะลืม หรือไม่ค่อยได้รับข้อมูลอย่างครบถ้วนในเรื่องของ การกันขโมย เหมือนกับทางฝั่งยุโรป ก็คือ การติดตั้งด้วยชุดอุปกรณ์ยึดพื้น หรือที่เรียกว่า Boltdown hardware นั่นเอง เพราะเจ้าสิ่งนี้จะทำหน้าที่เป็นตัวยึดเซฟเข้ากับพื้นหรือผนัง ตามจุดที่ได้รับการออกแบบมาเป็นอย่างดี ซึ่งเป็นดีไซน์เพื่อช่วยป้องกันการขโมยโดยเฉพาะ ด้วยลักษณะของฐานตู้เซฟที่ถูกยึดติดให้แนบชิดกับพื้นด้านล่างนี้เอง จึงทำให้การยกย้ายนั้นทำได้ยากมาก แม้จะมีการใช้เครื่องมือในการตัด หรือทุบทำลายตรงตำแหน่งของฐานเซฟก็ตาม และด้วยสถานการณ์บ้านเมืองเช่นนี้ด้วยแล้ว อย่าให้โจรต้องเป็นฝ่ายมาพิสูจน์คุณเลยว่า... ตู้เซฟของคุณ... พร้อมจะให้พวกมันขโมยแล้วหรือยัง!!!
Bluetooth® Wall-Mount ให้ “กุญแจ” เป็นมากกว่าที่เคย

May 27, 2020

Bluetooth® Wall-Mount ให้ “กุญแจ” เป็นมากกว่าที่เคย
หนึ่งในแกดเจ็ตสุดล้ำที่เคยได้รับการรีวิวโดยคนในวงการสายเทคโนโลยีอย่าง Jonathan Margolis บนเว็บไซด์ howtospendit.ft.com ไว้ว่า “ในตัวแอปฯ นั้น ช่วยจัดการให้กล่องเก็บกุญแจสามารถควบคุมการใช้งานได้ ถึงแม้ว่าจะอยู่ในระยะที่ห่างไกลเท่าใดก็ตาม” Master Lock Smart Key Safe กล่องเก็บกุญแจอัจฉริยะที่ช่วยเพิ่มความปลอดภัย และหลีกเลี่ยงจากความสับสน ด้วยฟังก์ชันต่างๆ ที่สามารถกำหนดสิทธิ์ในการเข้าถึงรหัส เพื่อตอบสนองด้านการใช้งานกุญแจ เพื่อการเข้าออกบ้าน หรือสำนักงานได้อย่างไร้ความกังวล เพราะในทุกๆ การเข้าออกนั้น ล้วนมีเหตุการณ์ที่ไม่คาดฝันนั้นซ่อนอยู่ - การเข้าออกบ้านในเวลาที่แตกต่างกันของญาติพี่น้อง
- กำหนดการเข้าทำงานของพนักงาน หรือผู้รับเหมาที่อาจจะคลาดเคลื่อนกัน
- การร่วมเป็นเครือข่ายให้เช่าที่พักผ่านแอปฯ อย่าง Airbnb จึงทำให้ “กุญแจ” ... จะยังคงถูกจัดความสำคัญอยู่ในระดับขั้นพื้นฐานของการรักษาความปลอดภัยนั่นเอง ส่งผลให้เจ้าของฉายา “Select Access Smart” เป็นอุปกรณ์ที่ตอบโจทย์ได้อย่างลงตัว ด้วยการทำงานของส่วนผสานระหว่างเทคโนโลยีด้านวิศวกรรมกับอุปกรณ์อิเล็กทรอนิกส์อันล้ำสมัย นอกจากการติดตั้งจะสามารถทำได้โดยง่ายก็ตาม แต่กลับยังคงแฝงความแข็งแกร่งไว้ในวัสดุโครงสร้าง และรูปลักษณ์อันโฉบเฉี่ยวได้เป็นอย่างดี โดยเบื้องหลังการแสดงผลผ่านบนแป้น LED และปุ่มตัวเลขนั้น คือ ประสิทธิภาพการประมวลผลของระบบบลูทูธบนแอปฯ Master Lock® Vault eLocks* และการปลดล็อคด้วยรหัส 5 หลัก ผ่านแป้นตัวเลขโดยตรง ทั้งยังสามารถตรวจสอบการใช้งานผ่านหน้าจอมือถือได้ตลอดเวลากันเลยทีเดียว *การตั้งค่าเพื่อกำหนดรหัสผ่าน สามารถทำได้ผ่านแอปฯ จากทุกที่บนโลก *พร้อมใช้งานทั้งในระบบ IOS และ Android “Cute, practical and reliable, the best technology” Jonathan Margolis  
เลือก “กุญแจ” ที่ใช่ ... ต้องโดนใจทุก “ล็อค”

May 21, 2020

เลือก “กุญแจ” ที่ใช่ ... ต้องโดนใจทุก “ล็อค”
เลือก “กุญแจ” ที่ใช่ ... ต้องโดนใจทุก “ล็อค” ฉีกกฎของการเลือกซื้อกุญแจที่ไม่ใช่แค่การเอา “ราคา” เป็นตัวตั้ง แต่ต้องลบกรอบเดิมๆ พร้อมเพิ่มเติมด้วยขีดฆ่า แล้วหันมา ณ จุดที่เป็นสตอรี่แห่งฟังก์ชันดีไซน์ และการจุดประกายให้กับทุกโสตประสาท...
ผ่านการการันตีคุณภาพ “#รับประกันตลอดอายุการใช้งาน”เบื้องหลังตัวอักษร “MasterLock” อันแฝงไว้ด้วยกลิ่นไอของความคลั่ง หรือการมี passion ในตัวกุญแจมานานนับกว่าศตวรรษ จนเกิดเป็นไทม์ไลน์ระดับตำนาน “ล็อคระดับโลก” ที่ผ่านสายตาผู้คนเรือนแสน จากสปอตในรายการซุปเปอร์โบลว์ (กีฬาอเมริกันฟุตบอลระดับเมเจอร์ลีค) ทำให้แรงสั่นสะเทือนดังกล่าว สามารถขยายไลน์การผลิตที่พร้อมให้คุณเลือกสรร ความปลอดภัยได้ตรงทุกความต้องการ ด้วยอัตลักษณ์เฉพาะตัวและการันตีในระดับโลก ด้วยการถ่ายทอดนิยามเหล่านั้น ผ่าน “ความแตกต่าง” ใน 7 ข้อสำคัญนี้ เพื่อเป็นการประกอบพิจารณา และอธิบายสัญลักษณ์ต่างๆ ที่ปรากฏอยู่บนบรรจุภัณฑ์ ซึ่งช่วยให้ผู้สนใจสามารถพิจารณา และเลือกใช้เลือกหาผลิตภัณฑ์ได้อย่างมีประสิทธิภาพสูงที่สุดนั่นเอง 1. “ความแตกต่าง” ด้วยสัมผัสจากตาเปล่า แม้จะปฏิเสธไม่ได้ว่า การประเมินคุณภาพเบื้องต้นเป็นเรื่องที่ไม่ง่ายสักเท่าไหร่ แต่หากลองสังเกตุอย่างถี่ถ้วนจะพบว่า ลักษณะของการโมลด์ขึ้นรูป และอัดพิมพ์ของกลุ่มโลหะประเภทนี้ จะสามารถเห็นความพิถีพิถันได้ไม่ยาก จากมุมองศาแต่ละด้าน ที่เกิดขึ้นจะมีความคมชัดไร้ที่ติ พร้อมทั้งรายละเอียดยังคงอยู่ครบถ้วนบนตัวกุญแจ หรือหากมีโอกาสได้ลองสัมผัสและทดสอบด้วยตนเอง ผ่านขั้นตอนของการไขล็อค หรือคุณสมบัติบางอย่างที่ถูกใส่เพิ่มเติมเข้าไปนั้น จะช่วยให้เราเข้าใจได้ว่า เรื่องราวของดีไซน์ที่ตอบโจทย์ ด้านความปลอดภัยได้อย่างหลากหลายมิตินั้น ยังเป็นหนึ่งในปัจจัยที่ส่งผลโดยตรงต่อการใช้กุญแจให้เกิดประโยชน์สูงสุดด้วยนั่นเอง (ด้วยจำนวนผลิตภัณฑ์ที่มีมากมายหลายรุ่นให้เลือกสรร) 2. “ความแตกต่าง” ด้วยขนาดของห่วงกุญแจ ในต่างประเทศมักให้ความสำคัญและใช้วิจารณญาณในเรื่องของ “ห่วงกุญแจ” ไว้เป็นอันดับต้นๆ เสมอ เพราะพื้นที่ที่เหลือ ระหว่างตัวกุญแจกับห่วงกุญแจหลังการคล้องแล้วนั้น มีนัยสำคัญถึงด้านความปลอดภัย และนับเป็นไฮไลต์ที่สามารถช่วยเพิ่มประสิทธิภาพ ในการป้องกันจากการทุบทำลายได้มากเลยทีเดียว 3. “ความแตกต่าง” ด้วยวัสดุโครงสร้าง ในปัจจุบันมีการใช้วัสดุหลักๆ ในการผลิตกุญแจจากกลุ่มของทองเหลืองและเหล็กเป็นส่วนใหญ่ โดยอาจมีการผ่านกระบวนการทางเคมีเพิ่มเติม ในการเคลือบหรือหุ้มอีกครั้ง เพื่อเป็นการเสริมความแข็งแกร่งให้สามารถตอบโจทย์ด้านการใช้งานได้อย่างสูงสุด เช่น - การเคลือบด้วยโครเมี่ยมหรือสแตนเลส ทำให้กุญแจมีคุณสมบัติที่ทนต่อการกัดกร่อนได้สูง เพื่อให้กุญแจรุ่นนั้นๆ สามารถนำไปใช้งานได้ ในสภาพอากาศที่รุนแรง รวมทั้งเป็นการป้องกันผลกระทบต่อระบบกลไกได้อีกด้วย - หรือการห่อหุ้มอีกชั้นหนึ่งด้วยวัสดุจากกลุ่มไวนิลหรือเทอร์โมพลาสติก ซึ่งช่วยให้ตัวกุญแจสามารถเป็นทั้งฉนวนไฟฟ้า และชั้นรองรับแรงกระแทก จึงเป็นกลุ่มกุญแจที่เหมาะกับทั้งงาน Indoor และ Outdoor รวมทั้งในเชิงอุตสาหกรรมได้เป็นอย่างดี 4. “ความแตกต่าง” ด้วยเทคนิคเสริมในการผลิต ในส่วนนี้มีความเชื่อมโยงกับหัวข้อที่ผ่านมา ด้วยการใส่เทคนิคเพิ่มเติมทั้งในลักษณะของงานออกแบบ และทางโครงสร้าง เพื่อเป็น การปรับประสิทธิภาพของกุญแจบางประการให้ดีขึ้น เช่น - ห่วงกุญแจที่ผ่านขั้นตอนการชุบแข็ง (Hardened) หรือการหล่อด้วยสแตนเลส (Stainless) ซึ่งนับเป็นอีกหนึ่งขั้นตอนที่ช่วยเพิ่มความทนทานต่อ สภาวะอากาศที่แปรปรวน - หรือการดีไซน์รูปทรงกุญแจแปดเหลี่ยม ทำให้ช่วยป้องกันจากเครื่องมือการตัดทำลายได้ในระดับสูงสุดนั่นเอง 5. “ความแตกต่าง” ด้วยระบบของกุญแจ การใช้กุญแจที่มีการนำเสนอด้านความปลอดภัยโดยไม่สามารถนำไปปั๊มเป็นกุญแจผีได้นั้น ก็นับว่าเป็นอีกหนึ่งข้อที่หลายคนมักมองข้าม แม้จะ ช่วยเสริมความปลอดภัยขึ้นได้อีกระดับเลยก็ตามที โดยทางผู้ผลิตที่เป็นแบรนด์ใหญ่ จะเลือกใช้เทคนิคการดีไซน์เข้ามาช่วยในการขั้นตอนการขึ้นรูป จึงทำให้ลูกกุญแจที่ใช้จะมีลักษณะไม่เหมือนกับรูปแบบของกุญแจมาตรฐานที่สามารถปั๊มได้ด้วยเครื่องมือทั่วไป ซึ่งวิธีการอันเป็นความลับนี้ ทำให้เกิดซีรี่ย์รหัสลูกกุญแจที่ไม่ซ้ำกันเป็นจำนวนมาก และเป็นลักษณะเฉพาะสำหรับใช้ในรุ่นนั้นๆ ผู้ใช้สามารถมั่นใจ ได้ถึงเหตุการณ์ที่ไม่คาดฝันนั่นเอง 6. “ความแตกต่าง” ด้วยการรับรองคุณภาพ กุญแจคุณภาพสูงมักมีการการันตีคุณภาพของผลิตภัณฑ์ ผ่านการรับรองมาตรฐานในระดับสากล โดยเฉพาะไฮไลต์จากการทดสอบเพิ่มเติม โดยองค์กรอิสระนั้น ยิ่งทำให้เราสามารถสังเกตุได้ง่ายขึ้น จากทั้งลักษณะของ ระดับความปลอดภัย (Security Level) และสัญลักษณ์ Lifetime Guarantee ที่ปรากฏอยู่บนบรรจุภัณฑ์ ยิ่งช่วยให้ผู้ใช้สามารถมั่นใจได้มากขึ้นอีกด้วย 7. “ความแตกต่าง” ด้วยการดูแลรักษาแบบง่ายๆ หลายคนคงลืมไปแล้วว่า เคยบำรุงรักษากุญแจบ้างหรือไม่? ซึ่งเทคนิคง่ายๆ ที่ช่วยให้กุญแจยังคงประสิทธิภาพสูงสุดนั้น คือ การตรวจเช็ค ที่กลไกการทำงานของระบบล็อค เมื่อการใช้งานไปสักระยะหนึ่ง ด้วยสาเหตุจากสภาพอากาศ และการเสียดสีกันระหว่างลูกกุญแจ และกระบอกกุญแจ อยู่เป็นประจำ จึงอาจทำให้เกิดการติดขัดในตอนเสียบลูกกุญแจหรือการหมุนล็อคได้ ดังนั้น การสเปรย์ด้วยน้ำมันหล่อลื่นเล็กน้อย จึงช่วยให้ประสิทธิภาพการทำงานของอุปกรณ์ภายในทำงานได้อย่างปกติ ไม่ติดขัด และยืดอายุการใช้งานได้อีกด้วย  

BECOME A MEMBER

Social Line